Tuesday, July 6, 2010

Dismounted Knights with Shortened Lances

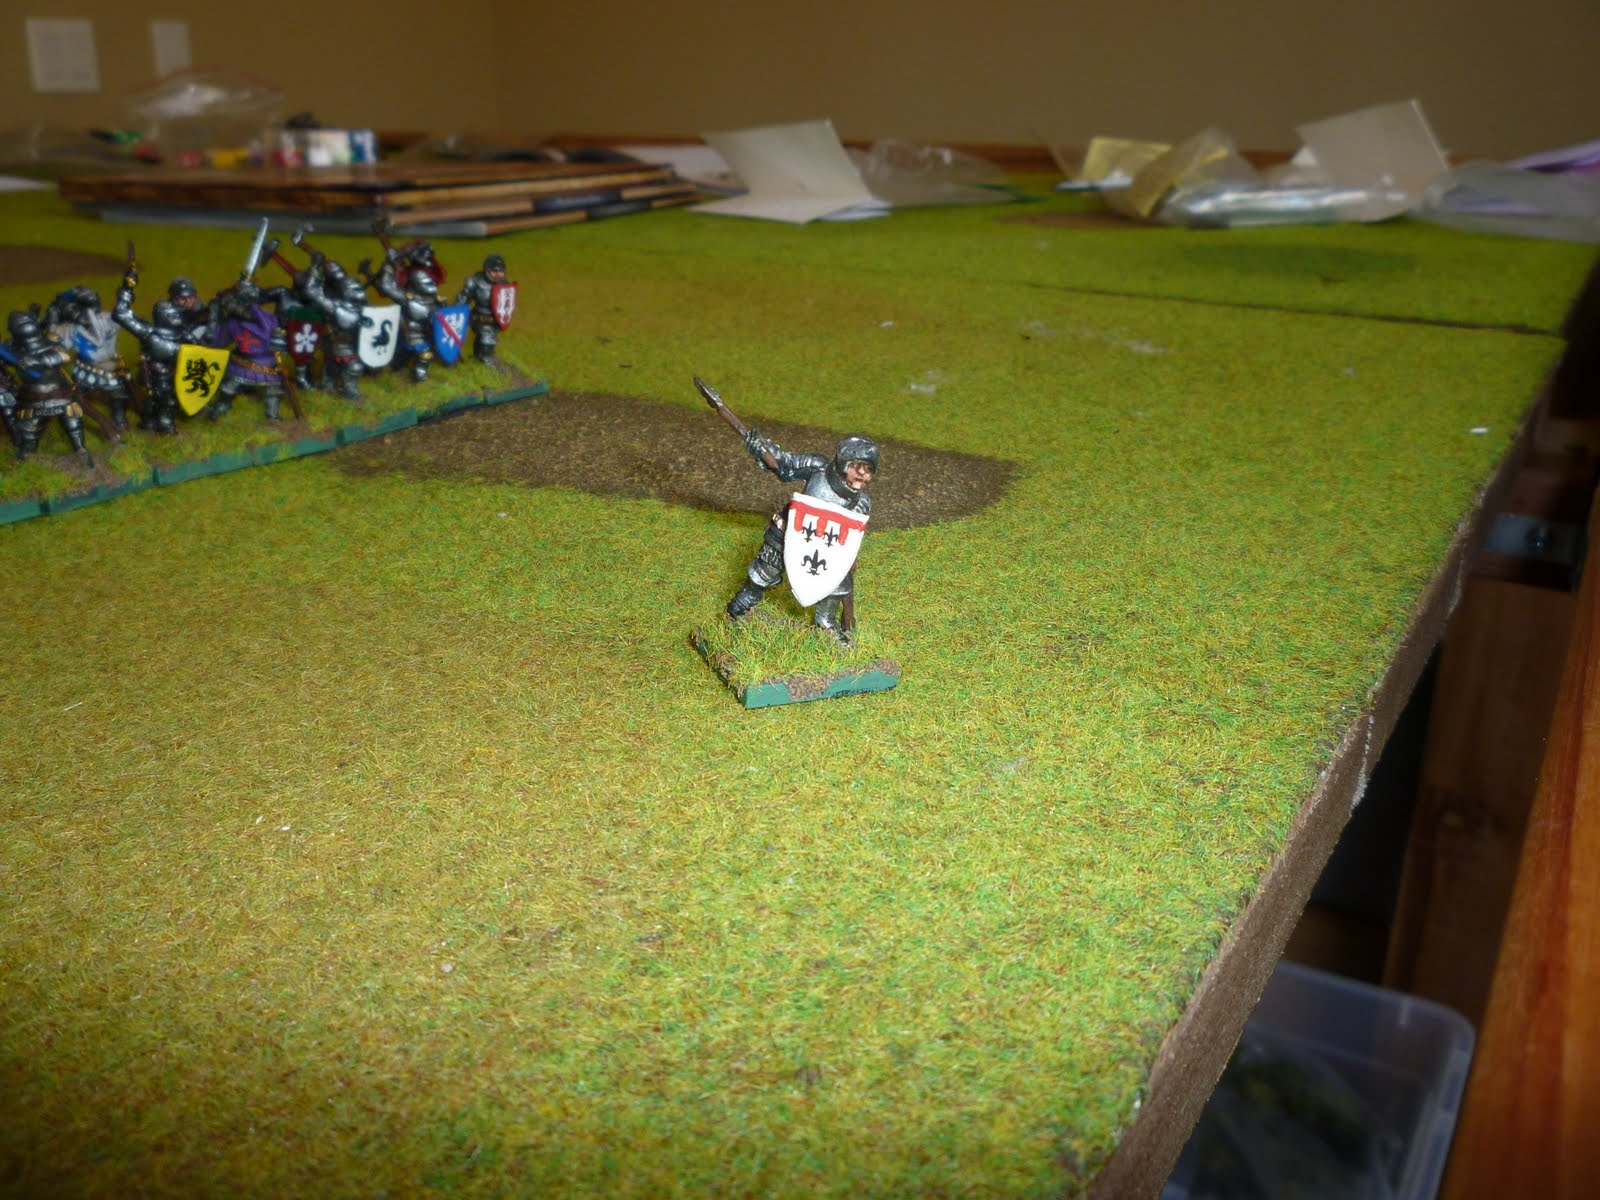
I finished my second bag of Old Glory 28mm French dismounted knights. This bag contained 30 dismounted knights armed with shortened lances. It was nice that I didn't have to fiddle around with shields. I figured they have lances shortened to spear length, so that would be enough for them to carry, right?

I did want some color on the knights so I painted them with colored surcoats. My decals didn't fit on the bodies since they were designed to go on shields. I actually had to hand-paint the coat of arms (coats of arms?) on the little guys. I tried to keep the designs simple, but you can only paint so many V-stripes before you have to tackle the more intricate designs.

I actually had to paint these knights a little brighter because the 4 year old GW black primer I used was a little dusty when it sprayed on. It gave the armor a gritty look I had paint over. It isn't so bad when the units are mixed up and it does give a nice variety to the different knights.

It might be more noticeable if all the new knights were in one unit next to an earlier unit, but I don't intend to field them like that. Welcome to the age of white armor and easier armor painting!

(ABOVE) Here's a front side view of the knights.

(ABOVE) Here's a straight-on front view of the knights. They look like they mean business. "I didn't shorten my best lance and lurch all the way over to here to not get stuck in!"

(ABOVE) Here's a rear view of the knights. This is not the business end of the knights, but after my last play test, it might be the view the Englishmen see most often. It does show the coat of arms nicely so the heralds can easily identify which nobles are fleeing from the fight. "Just going to check on my horse. I'll be right back!"


(ABOVE) Close-ups of two of the knights. One coat of arms is a decal. One is hand-painted. I won't ask you to guess. I'm not that conceited and VVV makes great decals.


(ABOVE) This is the consolidated force of painted French dismounted Men-at Arms. 4 12-man units for Piquet plus a few extras. One more unpainted bag of 30 MAA to paint, then I'll order a bag of dismounted English MAA and a bag of dismounted Scottish MAA.

The knights are mixed into the units because it's not as if the French nobles said, "Okay everybody with shortened lances, go to line A. Polearms, go to Line B. Hand weapons, go to Line C." I'll probably treat them as spear-armed for Piquet and superior to other spears.

(ABOVE) Same subject, different angle.

Monday, July 5, 2010

Agincourt First Playtest

One of the nice things about the Piquet rules is that the pace of the game is largely dictated by what cards you draw from your deck during a turn. This means the rules are very easy to play solitaire. This is a play test of my Agincourt game I ran in my game room solitaire over the weekend. Not all of the figures are painted yet, so there's no photos. I used empty labeled bases for those units which I haven't completed. For you Piquet experts, the Men At Arms are in Battle Mass Formation and the longbowmen are all in Chevron formation.

The above picture shows the armies deployed for battle. Each army has three commands. each command has a commander attached to a unit within it. Men at arms are basically armored knights. They sometimes fought mounted, but by now, they often dismounted to fight because the English archers were great at shooting their horses out from under them.

The French (Blue) are at the top of the battlefield. One command of mounted men-at-arms (MAA) is on the right flank. A command of dismounted MAA is in the center. The final command of dismounted MAA is on the French left flank. A unit of mounted MAA is attached to that command.

The English (Red) are at the bottom of the battlefield. They are on a slight rise with woods anchoring both flanks. The center command is made up of dismounted MAA. On each flank is a command made up of longbow units.


(ABOVE) You can see the French beginning their advance. The French won Impetus three Initiatives in a row and really made good use of that Impetus to close the distance between the two armies. The English longbow units fired at the mounted MAA units on the flank with long range volley fire.

Volley fire is used instead of direct fire when the longbow units units lift their bows to the sky and rain arrows from above on their enemies. This increases the range of the bows with a corresponding decrease in penetration and effectiveness.

This volley fire caused no casualties, but when the French drew their Uncontrolled Charge card, the mounted MAA surged ahead to come to grips with the missile units firing at them. Just the beginning of disaster for the French plan, if there was one...a plan, I mean...did I mention they were bad at plans?

(ABOVE) You can see the longbow units firing at the mounted MAA as they ride toward the waiting English defenders. The longbow units are behind sharpened stakes, so the cavalry need two Cavalry Move in Open cards to engage the longbowmen. Dismounted units can ignore the stakes.

(ABOVE) One of the right flank French cavalry MAA units lost two stands to longbow fire. The English then made a tactical morale challenge against the French, the French unit was tripled ( 6 to 2) in the challenge, and routed unralliable.

The other two charging mounted MAA units benefited from the following awesome 4 card flip: Uncontrolled Charge, Cavalry Move in Open, Heroic Moment, and Melee Resolution. A perfect draw that pushed the cavalry over the stakes and into the longbows with a shocking crash of armor and horseflesh.

(ABOVE) The French left flank mounted MAA unit used the Heroic Moment card to increase its chances in its melee. It fought with a d12+3 vs. a d6 and routed its longbow opponent. Unfortunately the enthusiastic French knights failed their Pursuit test and chased the routed archers off the table and into the English baggage train, never to be heard from again.

On the French right flank, the mounted French knights rolled an unlucky melee tie with the archer defenders. d10 vs. d4 resulted in a 2 to 2 tie. The French were the losers in the tie because their base Morale die (d4) was less than the English base Morale die (d6). The English then declared another Tactical Morale Challenge (d4 vs. d4). The French lost the roll 4 to 1, tripled, and routed unralliable.

The French mounted MAA units on the right flank have bad Morale dice. Historically, they were poorly led and badly organized. Many of the knights were a mix of the Armagnac and Burgundian parties and these rivals hated each other. So, they are better than the English archers at Melee (usually modified d10 vs. d4), but they fail Morale checks when things go badly.


(ABOVE) At this point, the French mounted MAA units are all either routing or pursued off the table, so it looks like it's up to the dismounted French knights to get the job done.The English won Initiative, won 18 Impetus pips, and fired a ton of longbow shots at the French knights trudging through the mud.

This missile fire ended up routing 4 different French units who continued the trend of rolling a "1" for all of their Morale checks. One of the fleeing units included the Commander in Chief's unit which lost two out of four stands to a 7 to 1 longbow shot.

Two French dismounted MAA units did manage to melee two longbow units.


(ABOVE) The longbow unit on the English right flank was a mounted longbow unit led by an English lord and his retinue. They outfought their French opponents who were obviously tired from their long stroll across the table (d4 base die).

On the English left flank, the French dismounted knights crushed their English opponents, sending them fleeing to the rear. The victorious French again pursued and received a point blank longbow shot into the flank from the longbow unit next to the newly created gap. They lost three stands (10 to 1 shot) and fled unralliable back to where they parked their horsies.


At this point, the battle is pretty much over. The French still have morale chips left, but with many of the units badly damaged and fleeing, there doesn't seem to be much hope for them. The dismounted French MAA still in the fight are opposite the English dismounted MAA who are more than a match for them.

It might not seem like it, but it was definitely a close contest. There were moments when I thought the English line would be broken and the French would be victorious. The English benefited from atrocious French dice on Morale Challenges and defense rolls vs. missile fire.

Great game. And Henry V never had to swing a weapon in anger.


Add Image

Saturday, June 19, 2010

Painted French Men-at-arms

I finally finished my first unit of Old Glory 28mm French dismounted men-at-arms. I used the Veni Vidi Vici decals for some of the shield heraldry and I hand-painted the other shields and surcoats. They don't have to be too complex because in the mass of a unit, it looks better to just have a variety of colors within the unit. The decals went on easily and then I dullcoted them to take off the decal sheen. Most of the heraldry is historical. Some I made up. So sue me.

There's a nice variety of poses in the pack. Some are wearing surcoats, some have open helms.


The red stripe across the shield signifies this gent is a bastard. Way to advertise!

The red markings above the heraldry on the top of this shield show that this knight is the heir and first in line of succession.

Wednesday, June 16, 2010

Magnetic Bases

I wanted to base my medieval miniatures individually so I could use them for Warhammer Ancient Battles and also place them on walls and in towers in the event I wanted to fight a castle siege. The Piquet Band of Brothers rules use stands for the units. Each unit has 4 stands. Each unit of men-at-arms and longbowmen should have 3 figures per stand.

I ordered 20mm square 3mm thick wooden bases from Litko. This is my standard base thickness that I use for all of my 28mm figures. I then ordered thin metal bases that corresponded to the Piquet infantry stand sizes: 30mm by 60mm. My plan was to put magnetic adhesive squares on the bottom of the individual bases so they would stick to the metal Piquet stands when players moved them. This plan also left me other options in case I decided to try rulesets that had different basing requirements. Sounds great, right?

The problem was that the dang magnetic strips weren't strong enough. They would fix the figures to the stands, but if you tried to lift them at all, the magnet would release the metal base and the figures would fall off. I could just see myself moving my mounted retinue knights in for the kill and then dropping them all over the table, "Ha Ha!, (CRASH, BREAK, BEND) Goddammit!"

I've also learned over time that figures you plan to use at a convention have to be very securely attached. Anything you imagine might be done to them, will be done to them. They will be dropped, stepped on, leaned on, dipped in ketchup, punted across the room, and pelted by dice, all by apologetic gamers who get a little carried away during that critical melee. Now maybe you understand my obsession with gloss coat varnish. Hmmm?

So, to solve my problem, I decided to use my old stand-by. Rare earth magnets. They sound very mysterious and magical, as if they're mined by elves from the center of the earth, but the little suckers are really powerful. I've used them before for my ACW artillerymen. I can actually hold one of my cannons upside down and the gunners will stay on the gun's base.

I don't order them from any gaming outlets. I use a company called Amazing Magnets. http://www.amazingmagnets.com They're in Irvine, CA behind the Orange Curtain and they offer a tremendous variety of magnets in different sizes and shapes for a reasonable price. I usually receive the magnets the day after I order them.

First, I drill a hole in the bases with a 1/4 inch drill bit. Watch the fingers! I use pliers.


Then I get the little magnet off the stack and crazy glue it in the hole. I sometimes have to tap it with a small hammer to make sure it sits flush with the bottom of the base.

I like the lighting in this picture. It looks like an evidence photo from the Unabomber's workshop.


Here's the end result. I hot-glued (is that a verb?) the figure on the top of the base and then covered it with dirt and static grass. Now this little guy will stay on a metal base until you give him a good tug.

I use at least 1/4 inch magnets because the smaller diameter magnets don't have enough magnetic attraction to do the job.

Tuesday, June 15, 2010

Creating Miniature Knights


Okay, I never pretended I was an expert in the Hundred Years War. I own a few books on the subject and I basically caught that "gamer fever" we all become contaminated with for no rhyme or reason. I even convinced my buddy Jason to start painting an army. It's contagious. Unfortunately, he chose Burgundians. Treacherous swine!

So the first thing that comes up when you buy all of this unpainted lead is: How do I paint the figures? Initially, I used quite a few resources on the internet and the gentlemen on TMP were a great help when I asked them annoying questions about the color of lances and whether sword belts were metal or leather.

I realized I was going to need some reference I could consult to explain to my thick head the different heraldry of the knights and the development of armor, etc. This basic knowledge would help me avoid the experience of running a game at a convention where some jag-off wearing a skin-tight "Leibstandarte AH European Tour" T-shirt would walk up with a smirk and tell me, "The French men-at-arms didn't wear helmets at Agincourt." And then I would go to jail.

"Creating Miniature Knights" by Peter Greenhill and Mario Venturi is an excellent hardcover coffee table book. The text is in Italian and English. It has nice maps of Crecy, Poitiers, and Agincourt. It contains illustrations of shield heraldry for about 150 different shields that were carried (or not carried) at the battles. It is made for hobbyists (specifically larger scale miniatures), and offers some great explanations of what the heraldric designs on the shields meant, summaries of the battles, developments in the hardware over the century, and other details. These explanations are short enough that it informs me without boring me. It also includes some great photos of dioramas painted to represent scenes from the battles. I really think the book is a must-have for anyone getting into the period.

And the best part...wait for it...I found it for $10 on Amazon!!! Even the wife couldn't argue with that deal. I used her own logic on her. "Honey, it normally lists for $50, and it's only $10. So we're making $40 when we buy it." Awesome lady.

The Rules for Agincourt Part 2

I like Warhammer Ancients Battles, but I don't know if those rules really could give a good simulation of the command problems the French were facing at the battle. With WAB, you can adjust the Leadership values of the troops and include scenario rules, but I suspect the battle would just have the French pushing their men-at-arms across an open field while the English fire at them. Turn 1, French move 3". English shoot. Turn 2, French move 3". English shoot. Etc. Eventually, the French would arrive, and then you'd roll some Break tests after melee. Hmmm.

Piquet has a very different approach to gaming than the traditional "You go, I go" pace of WAB. Each army has a Sequence Deck that is tailor-made to its capabilities. The players roll against each other for Initiative with d20's and the winner gets to use the die roll difference worth of Impetus Pips (IP) to activate his deck. It costs 1 IP to flip a card face up. Once face up, it costs 1 IP to use the card. For example, the Infantry in Open Move card, allows the player to move one infantry unit or Command Group per 1 IP spent. Firing a unit costs 1 IP. The Reload card allows you to reload one missile unit per 1 IP. You don't like the card? Flip another one for 1 IP.

There is also a mechanism for saving some Impetus Pips to use for Opportunity firing and actions during the other player's move, so you don't have to sit there and just get your ass kicked.

There are a variety of cards in the decks. The English have better cards, like the Brilliant Leader card (which can be used as any other card), St. Crispin's Day Speech, and Crushing Missilery. The French have bad cards like Milling Around, Apprehensive Levy, and Uncontrolled Charge.

The nice thing about the rules is you never really know what is going to come up in the deck. You can never count on getting the cards you need and you never know how many Impetus Pips you're going to have from turn to turn. The English might get tons of Reload cards and hammer the French with arrows while the French are Milling Around in the muddy field. Or maybe the French can get extremely lucky, roll tons of Impetus Pips, and Infantry Move their dismounted knights over and over again across the battlefield.

Each army has a reservoir of Morale Chips that reflects its general will to fight. As bad things happen, like destroyed units, routing units, etc., the player loses Morale Chips. The player can also spend Morale Chips to rally units, re-roll morale checks, or force his opponent's units to take morale checks. Once a player runs out of Morale Chips, the future of his army is bleak.

The Band of Brothers supplement for Piquet gives some great background and flavor to the Piquet Master rules. (The Master rules are available for something like $5. You need both the Master rules and a Supplement to play).

At Agincourt, the English longbowmen use stakes and have Volley Fire capability. The stakes stop mounted units, forcing them to use 2 Move cards to engage the archers. Volley Fire allows them to aim high, increase their long range, ignore linear obstacles, and rain arrows on the French with a reduction in damage capability. Missile troops can also fire versus the armor of the horses of mounted troops instead of their riders, so you begin to understand why the French knights dismounted and trudged toward the English.

The rules also allow for variable quality between units before the battle. Before each battle, you roll to see if the unit is motivated, average, or weary, and this effects its fighting ability in the game. A very cool technique is to wait until the unit has to make a roll before you determine this quality. "Aaaargh, my retinue knights are vacillating!"

The Agincourt battle matches up a Late French HYW army against a Late English HYW army. There must be over a hundred army lists in the BoB supplement and I obviously have focused on the Hundred Years War. Each list has a basic list of 12 units you can use, but there is also a special muster section called Beat the Drum which allows you to buy other units, develop intelligence, dig a hidden ditch, have a guide lead you through difficult terrain, invest in training and metallurgy, and otherwise customize your armies before a battle. Very fun.

So, the plan is to try the battle with Piquet: Band of Brothers. I'm still basing the miniatures individually for WAB, but since Piquet is stand-based, I can use magnetic bases and metal Piquet stands and still use my figures for both rulesets. Once we try Piquet, perhaps we'll try it with WAB and compare the two games.

The Rules for Agincourt Part 1


One of the biggest questions for entering a new period of gaming is usually what set of rules you plan to use. Many rules vary as far as how they want the figures based and no one wants to re-base their figures after they decide they don't like the rules they chose.

The two pre-gunpowder rulesets I've played the most are Might of Arms and Warhammer Ancient Battles (WAB). Might of Arms is a great set that is well-suited for large scale battles. WAB plays well at more of a skirmish level, but we've enjoyed using it for our Dark Ages games.

The other set I've always looked at with interest is Piquet. As I've become a more experienced gamer, I've started to prefer rules that better reflect the command confusion and friction of war. Generals in the pre-radio days didn't have precise control over the movements of their troops. This was probably never more true than at Agincourt.

The French were faced with some major command and control problems at Agincourt:

1) There was no clear leader in charge. Due to the political turbulence in France, neither the King nor his son were present at the battle. The French were instead led by the Constable of France, but the reality was that the Princes of the Blood present were just not going to listen to him.

2) Commands were often assigned by noble rank, not ability. The highest ranking nobles were given the best commands, regardless of their talent. As more big-wigs showed up at the battlefield, the command structure had to constantly change. There was no set unit structure. Troops were lumped together into commands and units as they arrived at the battlefield.

3) French leaders fought in the ranks. The leaders were attached to the units and fought in combat. They didn't sit back to direct the fighting. As a result, once a leader's unit became engaged in melee, you could forget about his ability to direct his command.

4) Some of the French nobility still hated each other. Some of the nobles had previously fought each other in the very bitter war between the Duke of Burgundy and the ruling Armagnac party. The level of trust was so low between the two groups that the Duke of Burgundy was told by the King to send his vassals to the muster, but stay home himself. The French weren't sure whose side he would fight for if he showed up on the battlefield. Burgundy ordered his own vassals to not respond to the King's call for troops. Now they were expected to cooperate with each other?

So, this is obviously a bad situation for the French. In contrast, the English were led by Henry V. Henry was charismatic and definitely in charge. His subordinate leaders were loyal and competent. His troops were also badly outnumbered, deep in enemy territory, and they knew they had to win the battle or they would never see England again (unless they were rich and paid a ransom). This makes for a motivated force.