 (ABOVE) View from the Burgundian side.
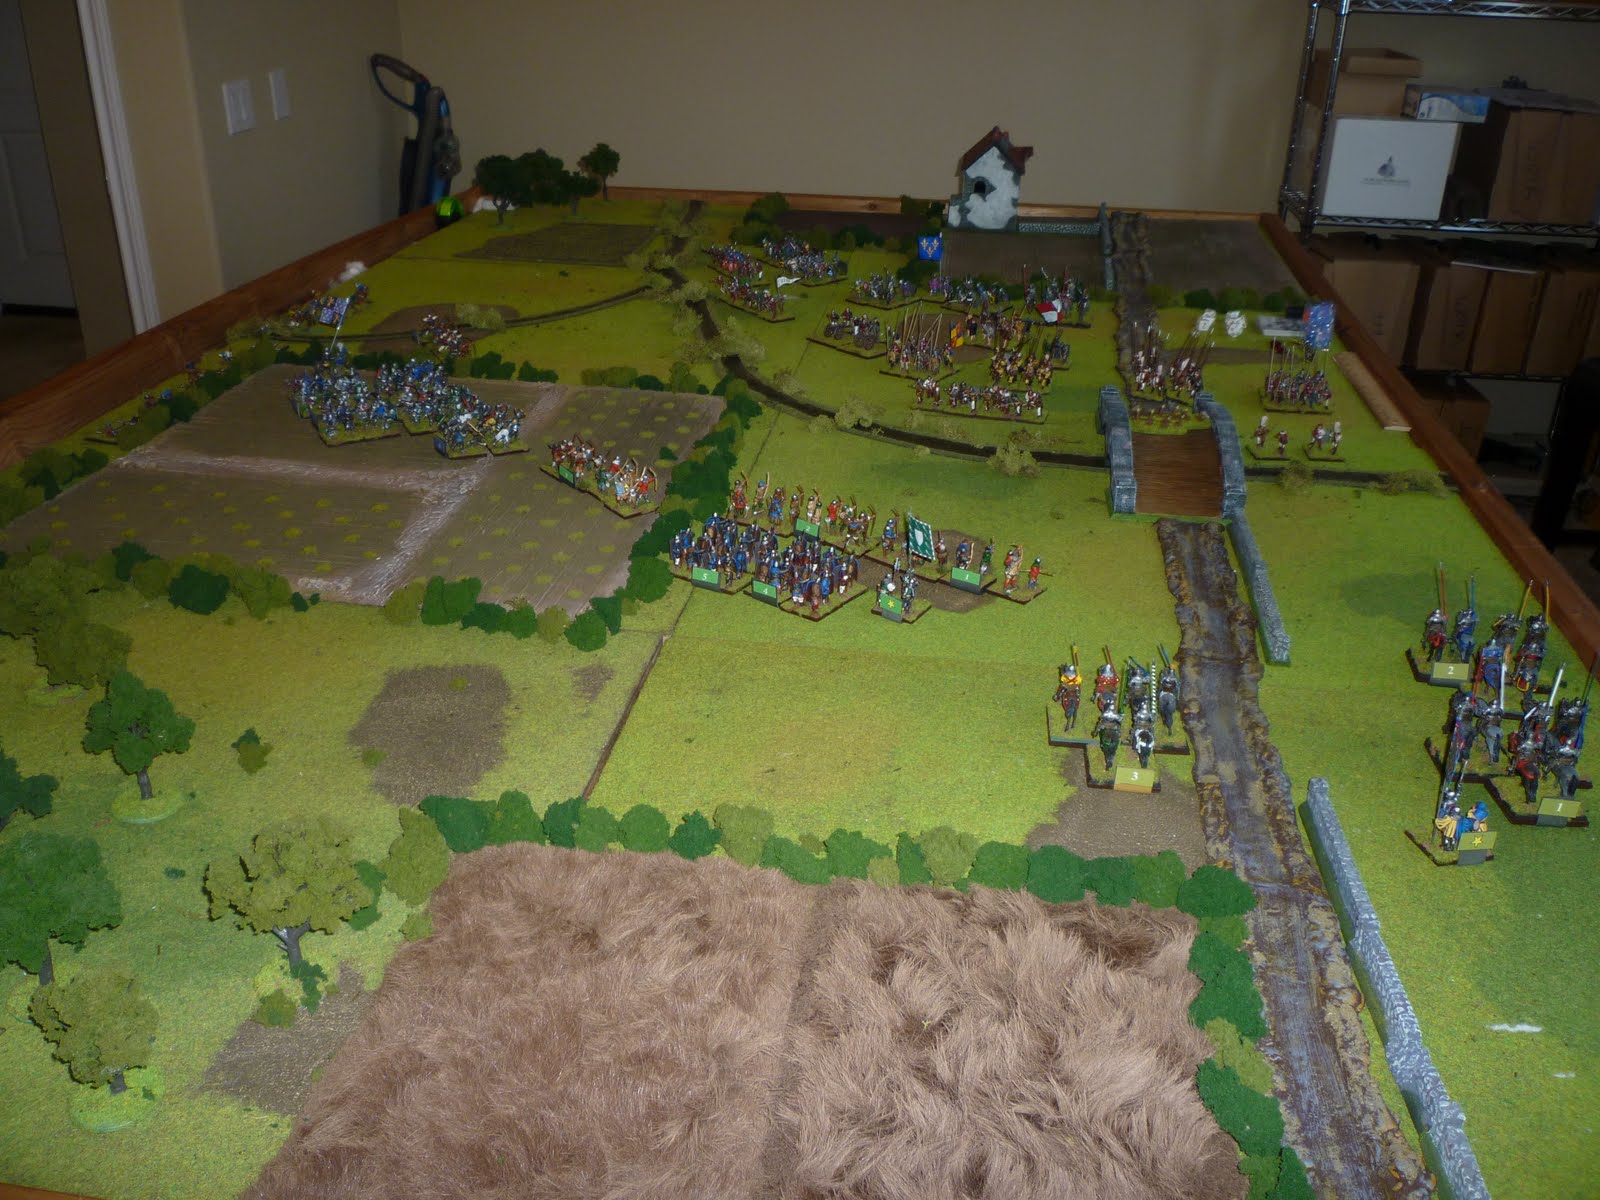
 (ABOVE) View from the Low Country side of the battlefield. The Low Country troops are defending from behind the river. The main river is a Class III obstacle. The side branch is a Class II stream.
 (ABOVE) This bridge is on the left flank of the Low Country defenses. It is barricaded.
 (ABOVE) The Low Country army consists of 4 units of militia pikemen, 3 units of mercenary crossbowmen, 4 units of burgher knights, a unit of mounted French knights, and an organ gun battery. Their general is Average.

(ABOVE) The Burgundians have 3 units of mounted knights, 5 units of dismounted Burgundian knights, 2 units of mercenary spearmen, 3 units of Picardy longbowmen, and one unit of English longbowmen. Greg rolled up an Abysmal general. Poor Greg!
 (ABOVE) The French archers approach the river bank and fire against the crossbowmen with little effect.

(ABOVE) The river has been crossed.
 (ABOVE) The Burgundian knights crossed the river and were blasted by the organ gun. The organ gun fired with great effect during the early part of the game. Meanwhile the Burgundians successfully forced the bridge and Low Country pike units have started forming into Hedgehog.
 (ABOVE) Burgundian cavalry attempts to force the river and bridge.
 (ABOVE) Reinforcing burgher knights drive off the Burgundian dismounted knights' assault
 (ABOVE) The cavalry unit assaulting the bridge was driven off, but another unit of mounted knights managed to ford the river. (BELOW)

The knights crushed the disorganized militia pikemen, but were then caught while pursuing and defeated by the French knights who waited in reserve. (BELOW)


The end result was a resounding win for the rebellious burghers. It was a good playtest of the scenario that was made much more difficult because Greg's Burgundian general ended up as an Abysmal commander. The Burgundian knights are terrible and about the same quality as their rich city counterparts. Known more their courtly manner and fine clothing, the militia-rated Burgundian men-at-arms underperformed once they realized the common townsmen actually planned on putting up a fight. Greg probably rolled up at least half of his units as poor, battle weary quality.
The militia pikemen were average (good against cavalry), but the Low Country mercenary crossbowmen were very strong and I might reduce them to two units the next time we play. The heavy armor of the crossbowmen was a big advantage against the Picardy longbowmen. The organ gun battery was fun and did pretty well.
Greg felt the river was too difficult an obstacle, so I plan on reducing it to a Class II obstacle. That will still make the river a Class III obstacle for the Burgundian mounted extra-heavy knights.
Great report. Makes me want to finish rebasing my Italian Wars stuff and get it on the table.
ReplyDeleteGreg C.
Nice game; those Burgundians look dangerous. Best, Dean
ReplyDeleteToo bad the Burgundians lost... great pics btw
ReplyDeleteGreat report and photos. I think it is time to dig out my HYW/WOTR troops and finish them off.
ReplyDeleteYou just want to love the Burgundians; the blue/ white livery is among the earliest of "uniforms" and their standards are cool. Their army is like a wargamer's wish list - some EHC, some longbows, some Pikes... but somehow, just as in actual history, the whole almost always manages to be less than the sum of the parts, eh?
ReplyDeleteI just love Organ guns, BTW - nothing screams Late Medieval/early Renaissance than Organ guns! This sort of situation, defending an obstacle or barricade is exactly where they were most useful. In open field battle, I just put them wherever I really don't want to have the enemy attack me. They are often a one trick pony, but it can still be quite a trick if you roll well!
Peter
Good stuff. Board looks great.
ReplyDeleteThanks for all of the kind words.
ReplyDeleteI'm waiting for Perry to design their plastic mounted MAA box set before I do my Charles the Bold Burgundians. Greg has been doing some of them while I paint the Swiss.
Peter, did you see my black/yellow Uri Swiss pikes? Old Glory!
the burgundians lost...:-( MY favourite WotR army.
ReplyDeleteGreat looking game.
Cheers
Paul
Poor Greg rolled between a 3 and 5 on a d20 for quality for almost 2/3 of the Burgundian units. Poor d4 base result. Perhaps the Burgundians were suffering from food poisoning. Or maybe the Low Country townsmen were more devious than anyone imagined....
ReplyDeleteUnfortunately, the Burgundians rolling poorly for Leadership Quality and unit quality both, although a severe handicap, is entirely too historical.
ReplyDeleteLooked through the pics and spotted the black/yellow quartered Swiss from Canton Uri - one of my favorites as you know, having seen my own Swiss. They just need their cantonal flag with the Bull of Uri upon it!
Peter