Wednesday, October 13, 2010

Color Piquet Cards

I recently made a set of Piquet sequence cards, but I wanted to develop a more visually appealing version of the cards. I designed the cards to look like Magic cards with artwork on the upper half of the card that reflects the action allowed by the card. I pulled most of the art from old paintings I found on the internet.

The lower half lists the title of the card and I figured out how to place smaller text below the titles to explain how the cards work. This way the players don't have to always refer back to the rulebook to see what they can do on each card. They can just read the card.


(ABOVE) This is the full set of cards. This deck gives you enough options to form a deck for any Hundred Years War army from Band of Brothers.


(ABOVE) The murder of Louis d'Orleans by the Burgundians and a painting of a river crossing.


(ABOVE) The "Sleeping Knight" painting. Perfect for the wasted impetus that comes with Milling Around.

(ABOVE) Knights puzzling their way through the woods.

(ABOVE) You better pray when you pull this card.

(ABOVE) I love this painting. The levies in the painting look nervous.

(ABOVE) Joan of Arc, of course.

(ABOVE) Another appropriate painting.

(ABOVE) Henry V


(ABOVE) I kept the backs the same because I like the neutrality of the black and white.

Thursday, September 23, 2010

Making Card Decks

One of the most important parts of Piquet is the use of Sequence cards to dictate the action in the game. Each army has its own Sequence Deck which reflects its particular strengths and weaknesses. You can only move your cavalry when the you flips your Cavalry Move In Open card. You need a Melee Resolution card to fight a melee. You need a Missile Reload card to reload your bowmen. Each historical supplement comes with sheets of cards you can cut out to make up these Sequence Decks. I laminated my cards and they are good enough to game with, but I was concerned they might become worn out after a lot of gaming.

I think I first heard of a website named artscow.com on the Too Fat Lardies Yahoo group. This company allows you to custom design decks of playing cards with any images or writing you want. You can even choose to remove the poker suits and symbols from the cards, but I opted to keep them so I could use the cards for Band of Brother's "Beat the Drum" army generation rules.

I chose a black and white picture for the back of the cards because I liked the image, but you can use color images. It also makes the deck a little more neutral and easier to use for any army.

When I tried to use jpg files, the card designer program warned me the images might not have enough resolution, so I used a bmp file I found on the internet instead. The deck cost about $12-$15. The cards are durable and comparable in quality to a real poker deck.

(ABOVE) Close-up of the card backs.


(ABOVE) Here's the full 52 card deck. Two decks should provide enough cards for two armies.

(ABOVE) Here are the fronts of the cards. I put exclamation points on those cards which have bad effects. I originally wanted to include an explanation of what each card allowed in smaller font below each title, but the card design program wouldn't let me have more than one font size on the front.

Saturday, September 11, 2010

The Convention Game: Agincourt

Well, we played out the battle of Agincourt at the local convention: Gateway 2010. Luckily, I had at least one experienced player on each side. Jason and Adam (French) and Ilan (English) had all played Piquet before. Jason and Ilan also played in the play-test games before the convention. Two English players were new and one French player was new, but they seemed to get the hang of the rules as we played.

Overall, I'm not really happy with the way the green metal bases look, but the figures are based individually for Warhammer Ancient Battles and I wanted to have some flexibility to try them out for different systems so I'll have to put up with them for now. I'd be willing to commit to basing for Piquet stands, but I want to be sure the guys I play against are ready to make the move before I do. Nothing is more annoying than having to rebase your figures for another new rule set. So far, everyone seems to like Piquet: Band of Brothers, so it looks promising.


(ABOVE) Here's the opposing sides before the game began. The English (left) began showering the French (right) with long range volley fire. The French ran to the battle line and launched their attack. The voice of the Constable of France could be heard pleading, "Remember the plan!!!"

(ABOVE) Closeup of the French mounted units on the left flank. Not many, huh? Where were the rest? Sleeping, arguing, eating, watering their horses, sulking....you get the idea. These were Greg's knights. Greg contributed approximately 90 figures to the battle which took some of the painting pressure off of me. Thanks Greg!

(ABOVE) The English longbows behind their stakes.

(ABOVE) The French right flank mounted knights charge against the English and Welsh longbows. Those stakes look painful!! Their leader, Cligny de Brabant, was shot through the visor by a longbowman and died instantly (1 in 20 chance). This was significant because his unit later routed the longbowmen in melee, but without the leadership of Brabant, the mounted knights pursued the fleeing archers with reckless abandon and were not seen again on the battlefield.


(ABOVE) The French dismounted men-at-arms (right) made great progress across the muddy field. At this point, the mounted knights were already fleeing from the battle, but the relatively unharmed dismounted knights were about to come to grips with the nervous longbowmen.


(ABOVE) The French king's sacred banner, the Oriflamme, leads the way to inspire the French. Never mind the fact that the French king and the Dauphine were safely camped back at Rouen, eating delicacies and getting manicures.

(ABOVE) Well, that was the high water point for the French. After we broke for lunch, the English went on an impetus tear. 19 impetus, 16 impetus, and then 8 impetus. A series of devastating point blank longbow volleys ripped through the French ranks as the archers fired, reloaded, then fired again. Lord Camoys led his band of English men-at-arms to victory against their heavily armored opposition. Camoys then started to threaten the flanks of the neighboring units. You can see his unit at the bottom of the picture.

Henry V lead his noble household and the Knights of the Garter into the battle and smashed the disordered column of French nobles facing him. Henry then wheeled his trusted companions into the flank of another disordered block of French knights which fled amid shouts of "Treachery!"

The red arrows are bad. One red arrow means they're routing. Two red arrows mean they're routing and can't be rallied. The battle ended shortly thereafter with a resounding English victory.


Thursday, August 26, 2010

Archers and stakes

Most people know that the English longbowmen were a major reason the English armies had such success against the French during the Hundred Years War. The composition of the French armies was definitely dominated by the French men-at-arms with their heavy armor, melee combat skill, and impetuous disregard for the chain of command.

At Crecy, the French men-at-arms attacked the English army while mounted. The mounted knights impulsively charged through their own crossbowmen. They galloped forward and were mown down by the English longbow fire. While the knights were heavily armored, many of their horses were not and the English archers learned to aim at the mounts. I can only imagine the chaos as horses collapsed, dumping their riders, only to have more mounted knights ride over or collide with the casualties. It must have been like a giant traffic collision in front of the archers' positions.

One would assume the French learned from the experience of Crecy. At Poitiers, the French were dismounted and formed into divisions aligned in column, one behind the other. Most of this change was an effort to control the impetuous elan of the knights. If they were dismounted, the men-at-arms couldn't move as quickly. If you placed them in column, the warriors in the rear were forced to moderate their pace because they were blocked by the division in front of them. For various reasons, mostly due to the strong defensive position of the English, the French were unsuccessful at Poitiers.

For the Agincourt campaign, the leaders of the French army had a solid plan. The dismounted MAA would go after the English MAA. The French set aside a specially selected mounted division that would target the English longbowmen. Only the knights with the best armor and the best-armored horses were chosen for this mounted division.

Unfortunately for the French, Henry V captured a few prisoners who told the English that the French intended to send their mounted contingent after the archers. Henry instructed his longbowmen to sharpen six foot stakes from the woods and march with them on the campaign. During the battle of Agincourt, the archers hammered these stakes into the ground in front of their positions to increase the strength of their defenses.

In Piquet Band of Brothers, the stakes only affect mounted units. A mounted unit has to pay an extra move to get past the stakes. Also, archers behind the stakes can't be intimidated by Cavalry Morale Challenges from the French mounted knights.

Agincourt was apparently one of the first battles where the English used these movable defensive obstacles, so it would be nice to represent them on the battlefield. It's great to tell the guys, "Okay, pretend your archers have stakes.", but it's much more scary when you actually see all of those sharp points staring at you.


I found a box of nails at Lowes with tips that looked like they were sharpened. I used a box of Sculpey I bought at Michaels and pushed the nails through the sculpey. Bake them at low heat in the oven, prime, paint, and flock and there you have it. Cheap, easy to make, stakes that look good and are useful for a variety of defensive purposes.

For some guys, the oven baking might be a problem, but I have to admit, I live in the kind of house where my mother-in-law doesn't even blink when she sees me sticking clay and nails in the oven. She just assumes it's some new wargaming project.

French Leaders and Mounted Knights

Well, I haven't posted in a while because I've been painting like a maniac, trying to get my French HYW army ready for the Agincourt game at our local convention. Luckily, I've infected a few friends with the "medieval" wargaming bug and their painting efforts have taken some of the pressure off of me.

I do realize that if you don't update blogs regularly, people will stop looking at them. So, here you go.

Here are some pictures of the knights and leaders I've painted for the battle. Unfortunately, I never seem to have time to take pictures in daylight, so the lighting isn't the best.

(ABOVE) Here's a long shot of the French dismounted and mounted knights I've painted since this project began. The dismounted knights are all Old Glory miniatures. The mounted knights and leaders are Perry miniatures.

(ABOVE) Here's a closer shot of a few of the dismounted knights. In the Piquet Band of Brothers game, dismounted knights form 12 figure units. Mounted knights form 8 figure units.


(ABOVE) Here's my unit of Perry mounted knights.

(ABOVE) This is the Comte de Brabant. He was the "commander" of one of the ill-fated mounted wings of the French army.


(ABOVE) Louis, the Count de Vendome. Another heavy hitter who fought at Agincourt. I believe his branch of the Bourbon line eventually succeeded to the throne of France.

(ABOVE) Marshal Boucicaut, one of the French leaders at Agincourt. He was knighted at 16. He was a warrior for 43 years and was considered to be a shining example of French chivalry. Boucicaut was captured at Agincourt and died in captivity in England six years later at the age of 55. His attempts to ransom himself were rebuffed by Henry V who was probably smart enough to realize that letting this old warhorse return to France would only cause him trouble down the line.


(ABOVE) Charles de Albret, Constable of France. Charles was a strong ally of the French Armangac party. He was nominally the overall commander of the French army, but he most likely lost control over the army once the battle began. He wanted to wait out the English, but once the English began firing on the French knights, there was little he could do to stop the attack. He was killed at Agincourt.


(ABOVE) And here is the Constable with his standard bearer. I like how the standard bearer is holding Charles' helmet. He's probably like, "Yeah, Charles, I'd love to hold your freaking helmet for you. Maybe you didn't notice I'm already holding your f$%&%king gigantic banner standard already. No problem." I probably wouldn't have lasted very long in medieval France.


(ABOVE) Count de Fauquembergues. Despite the fact that most of the men-at-arms in the third division of the French army headed for home when they saw the fate of the first two divisions, Fauquembergues led the final charge of the remainder of that third division against the English. And guess what? He died on the battlefield. Very chivalrous.


(ABOVE) Another mounted knight. No one in particular, but he probably fled the battlefield in panic at some point.

Tuesday, July 6, 2010

Dismounted Knights with Shortened Lances

I finished my second bag of Old Glory 28mm French dismounted knights. This bag contained 30 dismounted knights armed with shortened lances. It was nice that I didn't have to fiddle around with shields. I figured they have lances shortened to spear length, so that would be enough for them to carry, right?

I did want some color on the knights so I painted them with colored surcoats. My decals didn't fit on the bodies since they were designed to go on shields. I actually had to hand-paint the coat of arms (coats of arms?) on the little guys. I tried to keep the designs simple, but you can only paint so many V-stripes before you have to tackle the more intricate designs.

I actually had to paint these knights a little brighter because the 4 year old GW black primer I used was a little dusty when it sprayed on. It gave the armor a gritty look I had paint over. It isn't so bad when the units are mixed up and it does give a nice variety to the different knights.

It might be more noticeable if all the new knights were in one unit next to an earlier unit, but I don't intend to field them like that. Welcome to the age of white armor and easier armor painting!

(ABOVE) Here's a front side view of the knights.

(ABOVE) Here's a straight-on front view of the knights. They look like they mean business. "I didn't shorten my best lance and lurch all the way over to here to not get stuck in!"

(ABOVE) Here's a rear view of the knights. This is not the business end of the knights, but after my last play test, it might be the view the Englishmen see most often. It does show the coat of arms nicely so the heralds can easily identify which nobles are fleeing from the fight. "Just going to check on my horse. I'll be right back!"


(ABOVE) Close-ups of two of the knights. One coat of arms is a decal. One is hand-painted. I won't ask you to guess. I'm not that conceited and VVV makes great decals.


(ABOVE) This is the consolidated force of painted French dismounted Men-at Arms. 4 12-man units for Piquet plus a few extras. One more unpainted bag of 30 MAA to paint, then I'll order a bag of dismounted English MAA and a bag of dismounted Scottish MAA.

The knights are mixed into the units because it's not as if the French nobles said, "Okay everybody with shortened lances, go to line A. Polearms, go to Line B. Hand weapons, go to Line C." I'll probably treat them as spear-armed for Piquet and superior to other spears.

(ABOVE) Same subject, different angle.

Monday, July 5, 2010

Agincourt First Playtest

One of the nice things about the Piquet rules is that the pace of the game is largely dictated by what cards you draw from your deck during a turn. This means the rules are very easy to play solitaire. This is a play test of my Agincourt game I ran in my game room solitaire over the weekend. Not all of the figures are painted yet, so there's no photos. I used empty labeled bases for those units which I haven't completed. For you Piquet experts, the Men At Arms are in Battle Mass Formation and the longbowmen are all in Chevron formation.

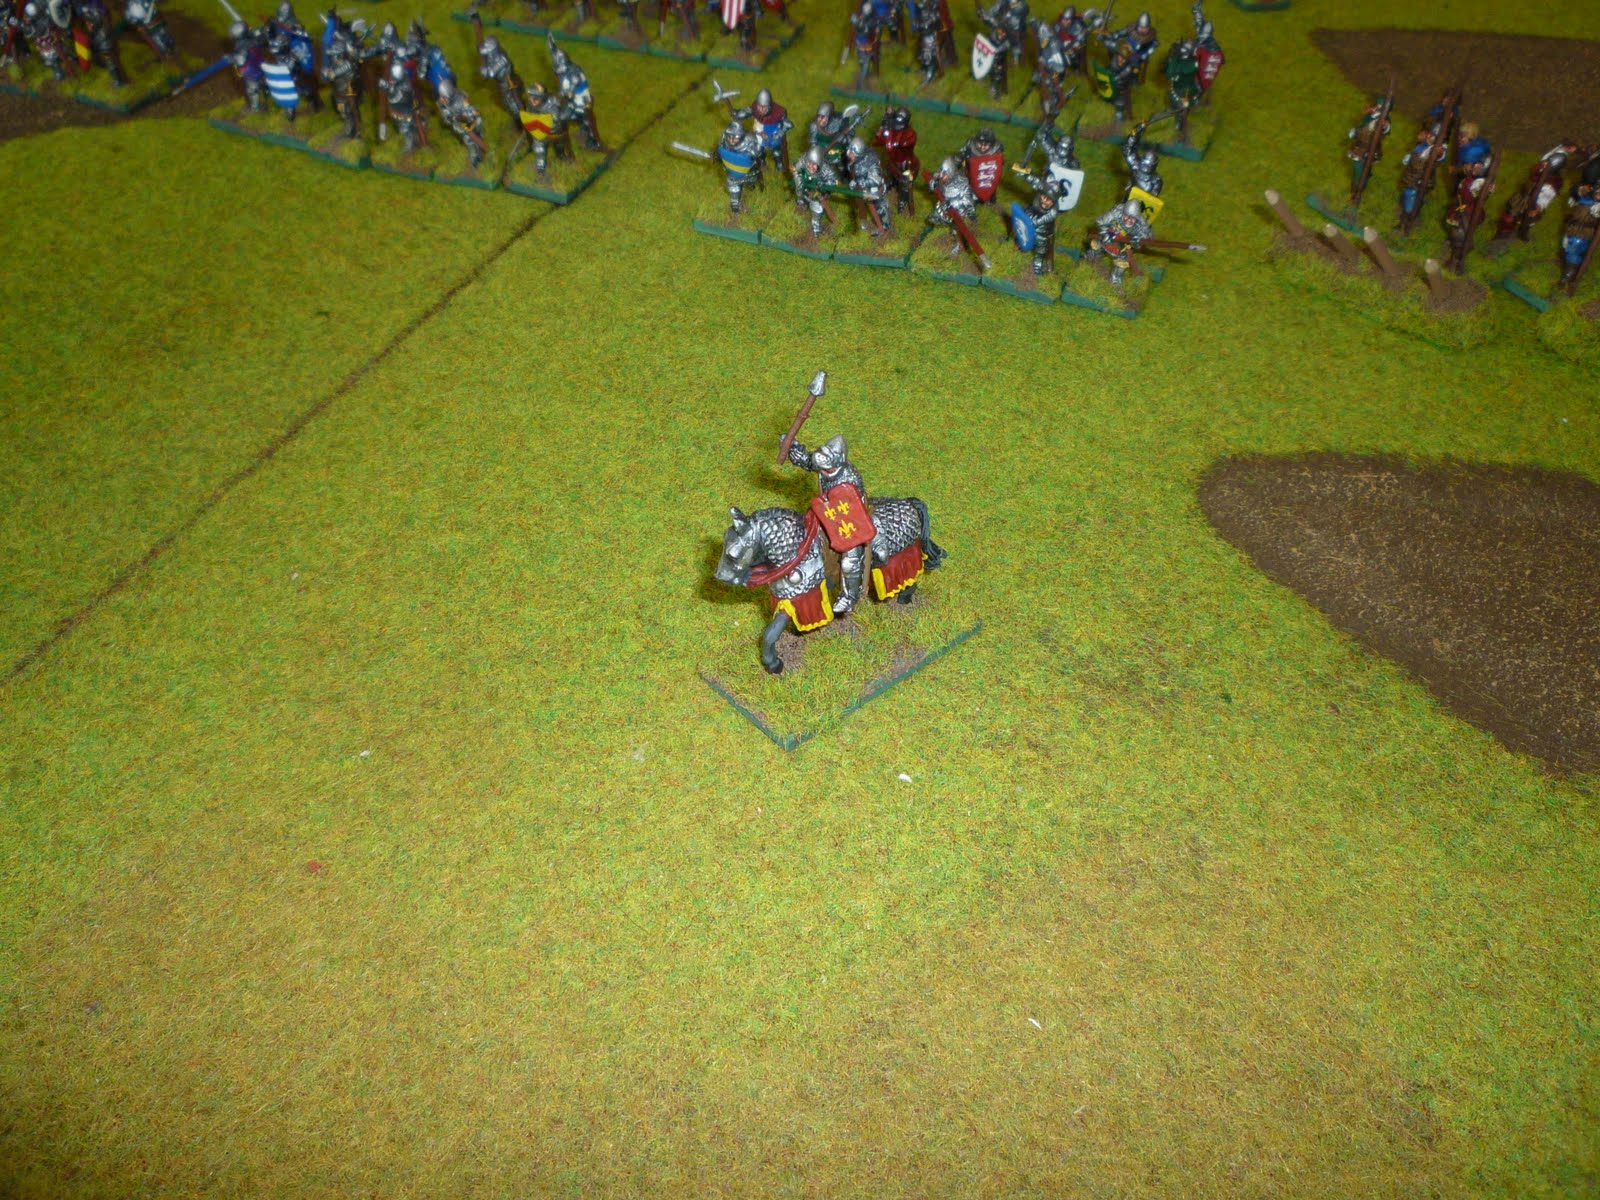
The above picture shows the armies deployed for battle. Each army has three commands. each command has a commander attached to a unit within it. Men at arms are basically armored knights. They sometimes fought mounted, but by now, they often dismounted to fight because the English archers were great at shooting their horses out from under them.

The French (Blue) are at the top of the battlefield. One command of mounted men-at-arms (MAA) is on the right flank. A command of dismounted MAA is in the center. The final command of dismounted MAA is on the French left flank. A unit of mounted MAA is attached to that command.

The English (Red) are at the bottom of the battlefield. They are on a slight rise with woods anchoring both flanks. The center command is made up of dismounted MAA. On each flank is a command made up of longbow units.


(ABOVE) You can see the French beginning their advance. The French won Impetus three Initiatives in a row and really made good use of that Impetus to close the distance between the two armies. The English longbow units fired at the mounted MAA units on the flank with long range volley fire.

Volley fire is used instead of direct fire when the longbow units units lift their bows to the sky and rain arrows from above on their enemies. This increases the range of the bows with a corresponding decrease in penetration and effectiveness.

This volley fire caused no casualties, but when the French drew their Uncontrolled Charge card, the mounted MAA surged ahead to come to grips with the missile units firing at them. Just the beginning of disaster for the French plan, if there was one...a plan, I mean...did I mention they were bad at plans?

(ABOVE) You can see the longbow units firing at the mounted MAA as they ride toward the waiting English defenders. The longbow units are behind sharpened stakes, so the cavalry need two Cavalry Move in Open cards to engage the longbowmen. Dismounted units can ignore the stakes.

(ABOVE) One of the right flank French cavalry MAA units lost two stands to longbow fire. The English then made a tactical morale challenge against the French, the French unit was tripled ( 6 to 2) in the challenge, and routed unralliable.

The other two charging mounted MAA units benefited from the following awesome 4 card flip: Uncontrolled Charge, Cavalry Move in Open, Heroic Moment, and Melee Resolution. A perfect draw that pushed the cavalry over the stakes and into the longbows with a shocking crash of armor and horseflesh.

(ABOVE) The French left flank mounted MAA unit used the Heroic Moment card to increase its chances in its melee. It fought with a d12+3 vs. a d6 and routed its longbow opponent. Unfortunately the enthusiastic French knights failed their Pursuit test and chased the routed archers off the table and into the English baggage train, never to be heard from again.

On the French right flank, the mounted French knights rolled an unlucky melee tie with the archer defenders. d10 vs. d4 resulted in a 2 to 2 tie. The French were the losers in the tie because their base Morale die (d4) was less than the English base Morale die (d6). The English then declared another Tactical Morale Challenge (d4 vs. d4). The French lost the roll 4 to 1, tripled, and routed unralliable.

The French mounted MAA units on the right flank have bad Morale dice. Historically, they were poorly led and badly organized. Many of the knights were a mix of the Armagnac and Burgundian parties and these rivals hated each other. So, they are better than the English archers at Melee (usually modified d10 vs. d4), but they fail Morale checks when things go badly.


(ABOVE) At this point, the French mounted MAA units are all either routing or pursued off the table, so it looks like it's up to the dismounted French knights to get the job done.The English won Initiative, won 18 Impetus pips, and fired a ton of longbow shots at the French knights trudging through the mud.

This missile fire ended up routing 4 different French units who continued the trend of rolling a "1" for all of their Morale checks. One of the fleeing units included the Commander in Chief's unit which lost two out of four stands to a 7 to 1 longbow shot.

Two French dismounted MAA units did manage to melee two longbow units.


(ABOVE) The longbow unit on the English right flank was a mounted longbow unit led by an English lord and his retinue. They outfought their French opponents who were obviously tired from their long stroll across the table (d4 base die).

On the English left flank, the French dismounted knights crushed their English opponents, sending them fleeing to the rear. The victorious French again pursued and received a point blank longbow shot into the flank from the longbow unit next to the newly created gap. They lost three stands (10 to 1 shot) and fled unralliable back to where they parked their horsies.


At this point, the battle is pretty much over. The French still have morale chips left, but with many of the units badly damaged and fleeing, there doesn't seem to be much hope for them. The dismounted French MAA still in the fight are opposite the English dismounted MAA who are more than a match for them.

It might not seem like it, but it was definitely a close contest. There were moments when I thought the English line would be broken and the French would be victorious. The English benefited from atrocious French dice on Morale Challenges and defense rolls vs. missile fire.

Great game. And Henry V never had to swing a weapon in anger.


Add Image